If the candidate has an older version of the I-9 (two page I-9 shown below), print both pages, and complete section 3 with the new name. Before and after examples are shown below. The updated version of the I-9 should then be uploaded to the candidate record along with a scanned copy of the legal document showing that the candidate’s name has been changed.
Before completing section 3:
After completing section 3. For a name change only fill out the Last Name, First Name, Middle Initial boxes then sign, date, and print your name. Do not fill in Date of Rehire, Document Title, Document Number, or Expiration Date boxes. Upload the completed I-9 to the candidate record.
After the document has been completed, upload the I-9 and the scanned copy of the legal document showing that the candidate’s name has been changed to the candidate record. A note should also be added to the candidate record to recap the change. The I-9 should be given to the Office Administrator, Senior Service Coordinator/Admin, or Manager for them to adjust the name in Bullhorn and Prism. Service Coordinators SHOULD NOT adjust names in Bullhorn. **Also, a note should be added to the candidate record indicating the change. We must notate the change in the candidate record and attach the legal name change document.
To complete I-9 Supplement B (Formerly Section 3) in Bullhorn complete the following steps:
1. From the candidate record click Onboarding365
2. Click Options then Edit Documents
3. Click Options then Add Document
4. Filter the Document list by clicking the “martini glass”
5. In the filter options, select Contains then type in “I-9 Sup” and click filter

6. Then Add Document
7. You will be redirected to the Onboarding365 screen where you will see the document has been added. Click Continue.
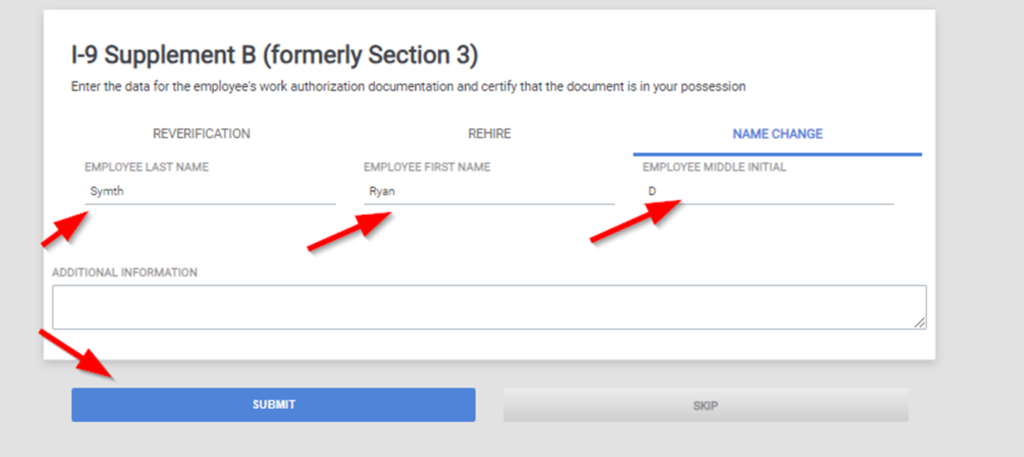
8. The I-9 Supplement B screen will appear. Click Name Change
9. Fill in the name fields and click submit
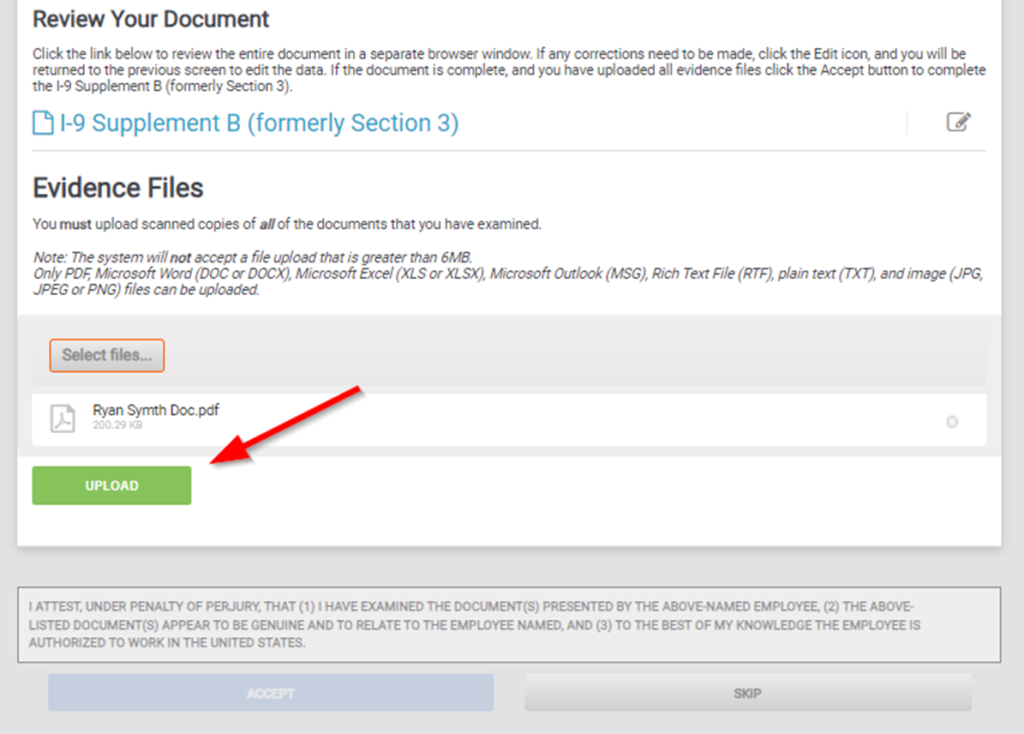
10. The completed form will show for your review. If everything is correct upload the evidence file(s) (this is the document showing the legal name change) by clicking Select Files.
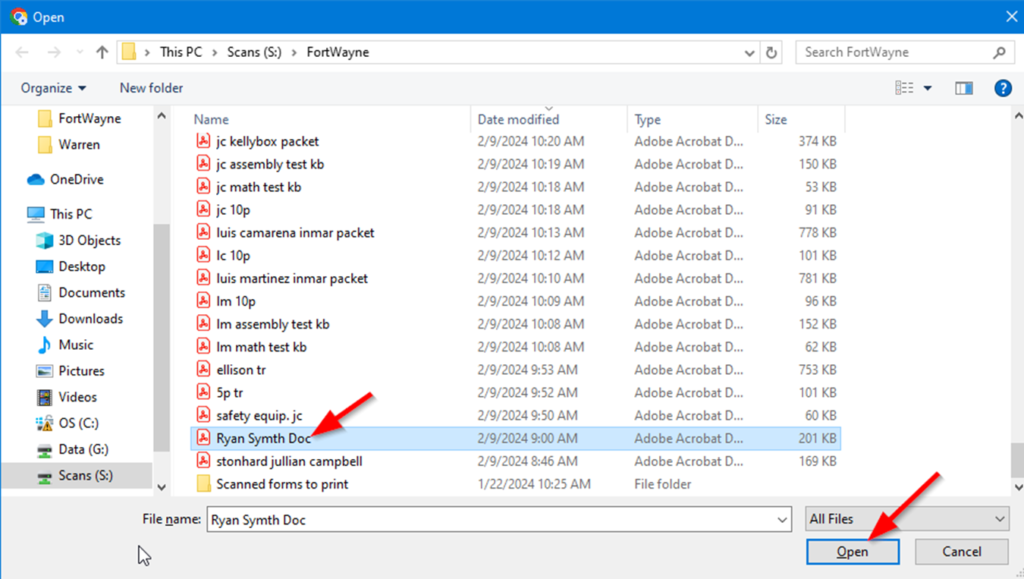
11. Navigate to where the scanned file is located, select it, and click open
12. Then click upload
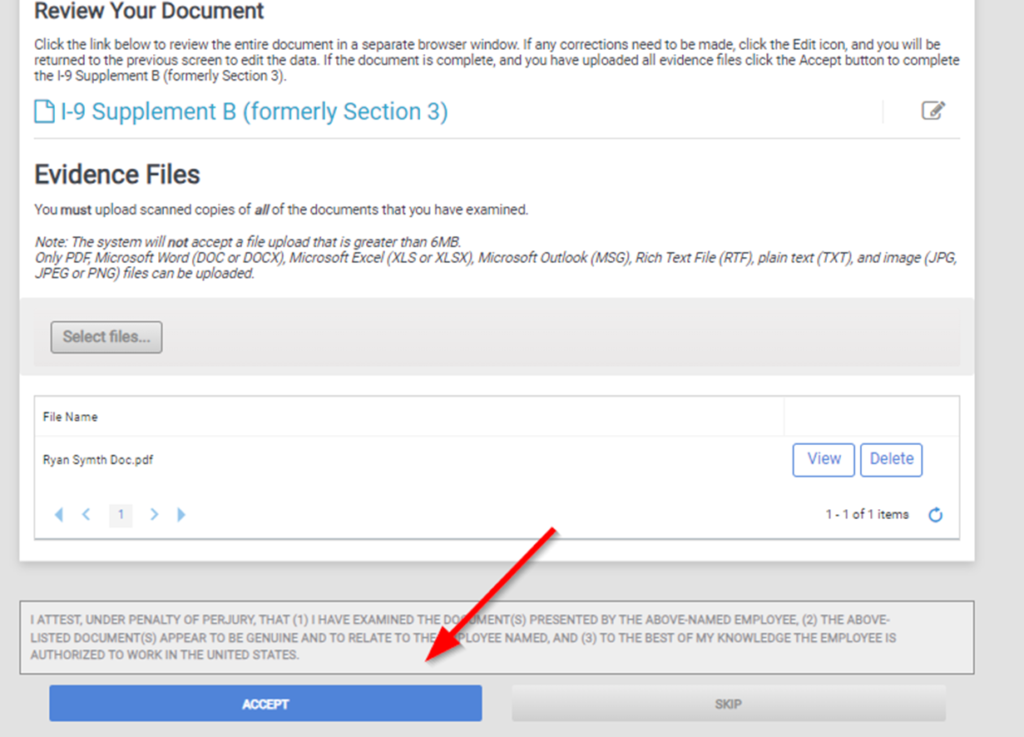
13. Once the file has been uploaded click Accept
14. You will be redirected to the Onboarding365 screen in the candidate profile. Click Complete
After clicking complete, log a note in the candidate record summarizing the change and give the candidate ID to your Office Administrator or Manager to adjust the name in Bullhorn and Prism. Service Coordinators SHOULD NOT adjust names in Bullhorn.


