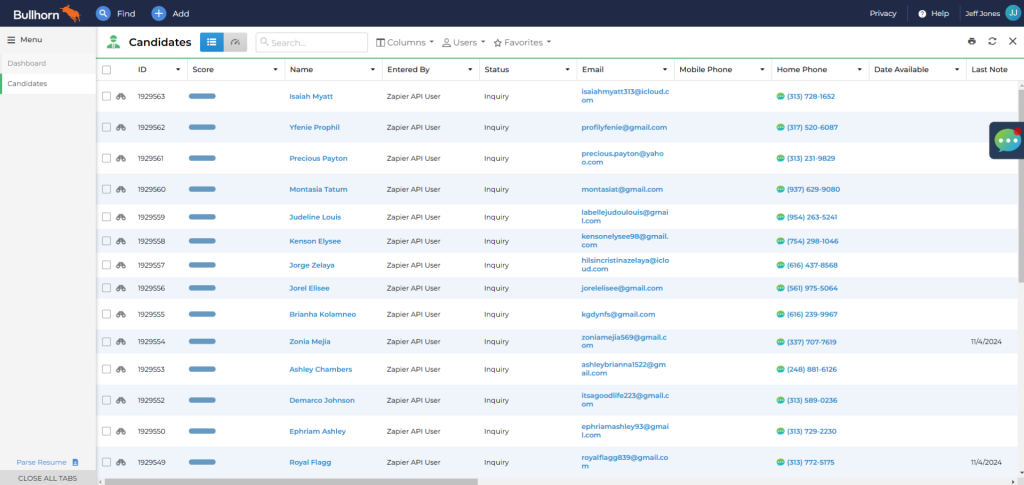
Starting In Bullhorn, open the slide out menu and select “Candidates.” Once you’re on the Candidates screen, you can filter the candidates to your preferred criteria.
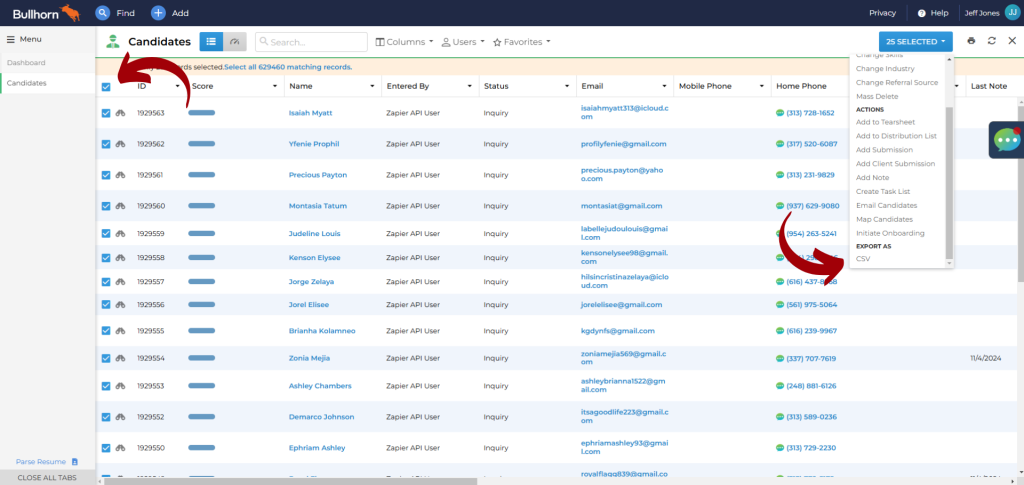
Once you’ve filtered your candidates down to who you’d like to send your text campaign to, check the “select” box next to “ID” and then “Select All.” Once you have them selected, on the right hand side you’ll want to select the blue button in the upper right hand corner that says “XX Selected,” this will open up a drop down menu. You’ll want to scroll to the bottom of this menu and select “Export to CSV.” This will create a Spreadsheet of all of the selected candidates and the columns that you have selected. You can use the spreadsheet as is, or you can edit it before hand to make things easier. The only columns that are needed are Full Name and Phone Number.
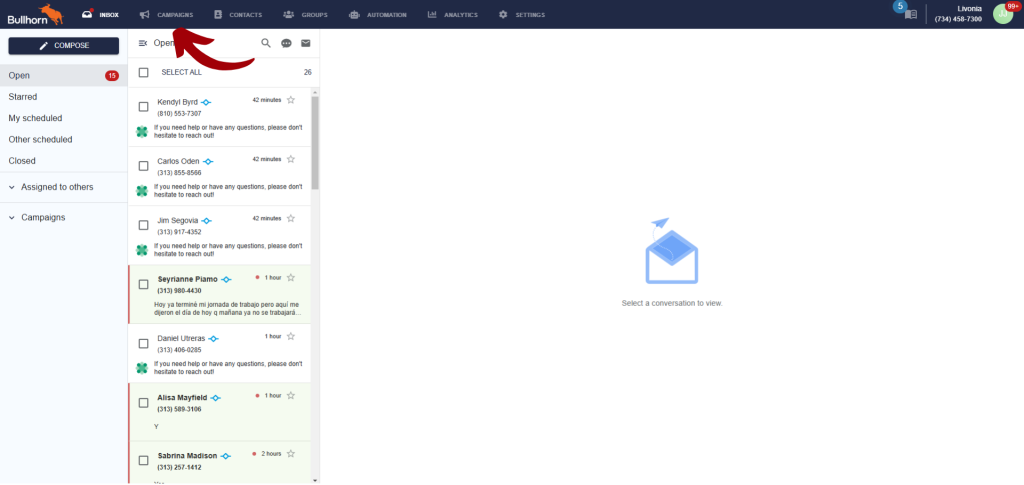
Once you have your spreadsheet ready to go, you’re going to open up Bullhorn Messaging. From Bullhorn Messaging, you’ll select the “Campaigns” tab.
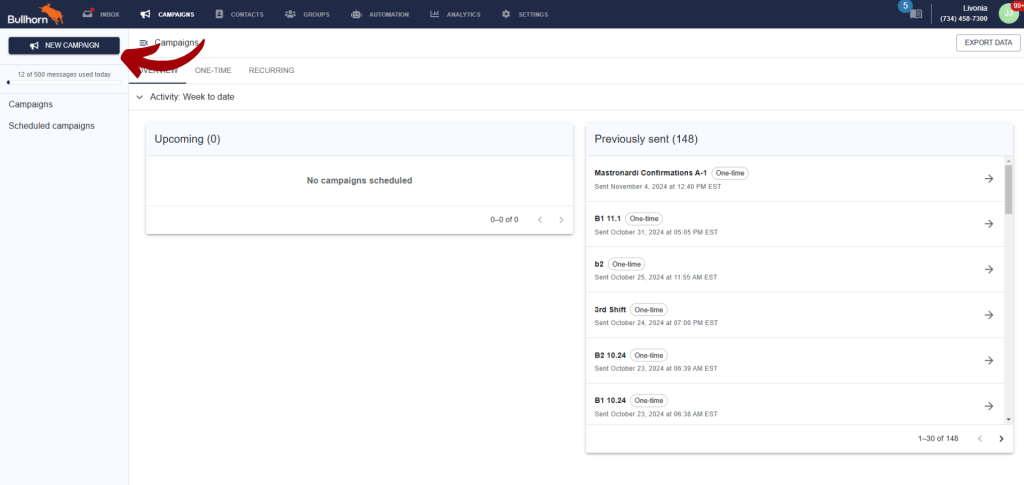
On the Campaigns Tab, you’ll want to select the blue “New Campaign” button.
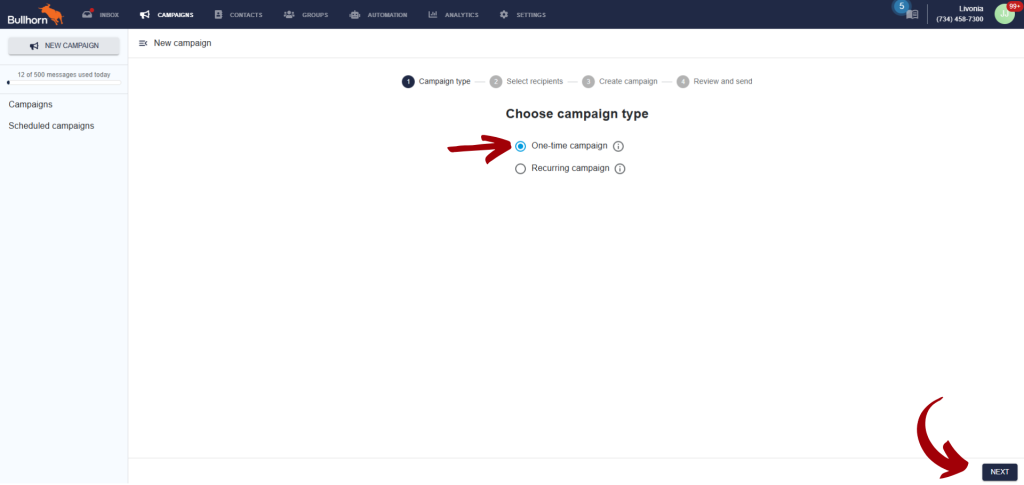
From here you’re going to want to select “One Time Campaign” and then select the “Next” button in the bottom right hand corner.
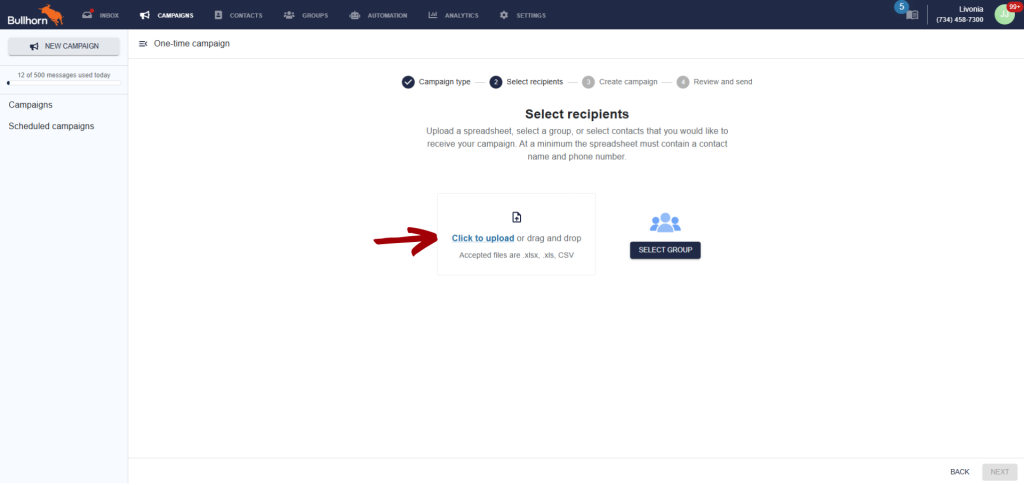
Next, you’ll want to select the option to upload a CSV file.
From here, you need to map the name and phone number fields. If you edited your CSV file earlier, those should be the only two fields available, however if you didn’t then you will have to scroll through and just make sure to match Full Name and Phone Number to the appropriate columns and then click “Import.” Then select “Next.”
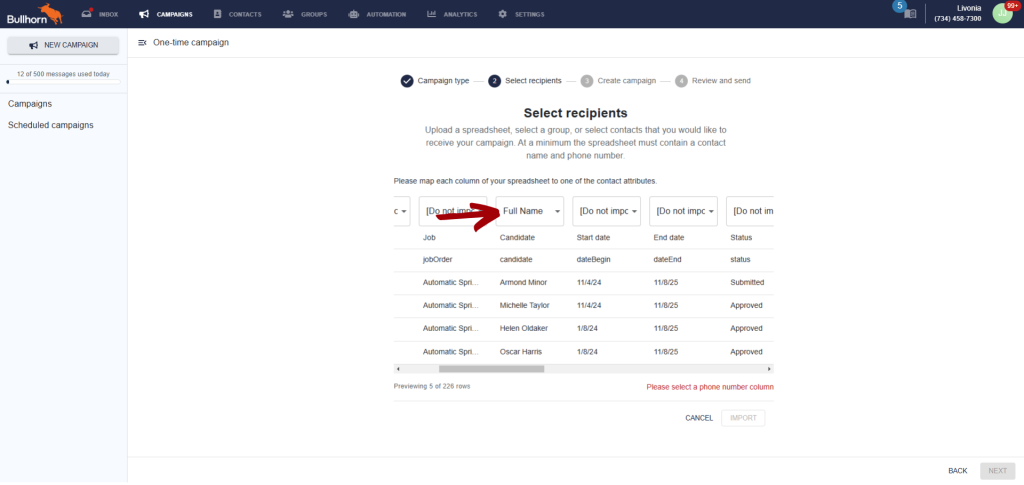
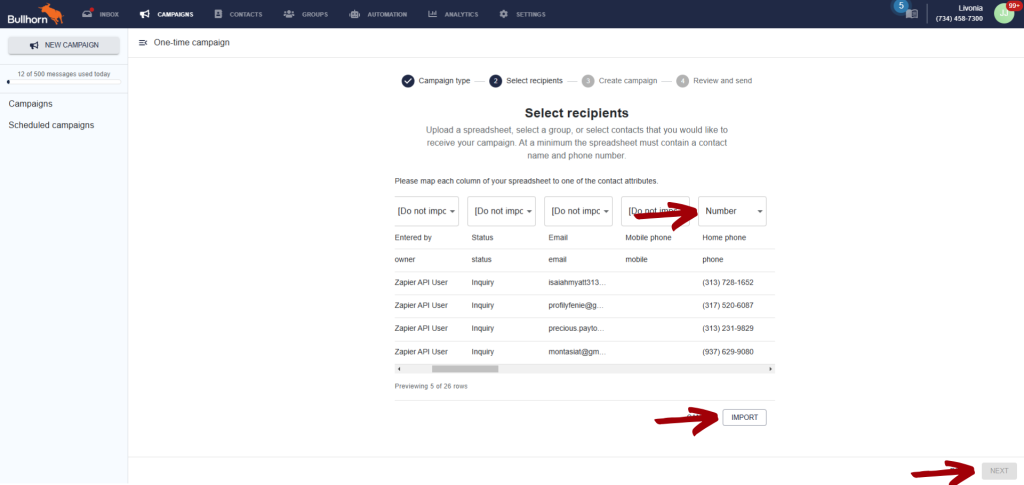
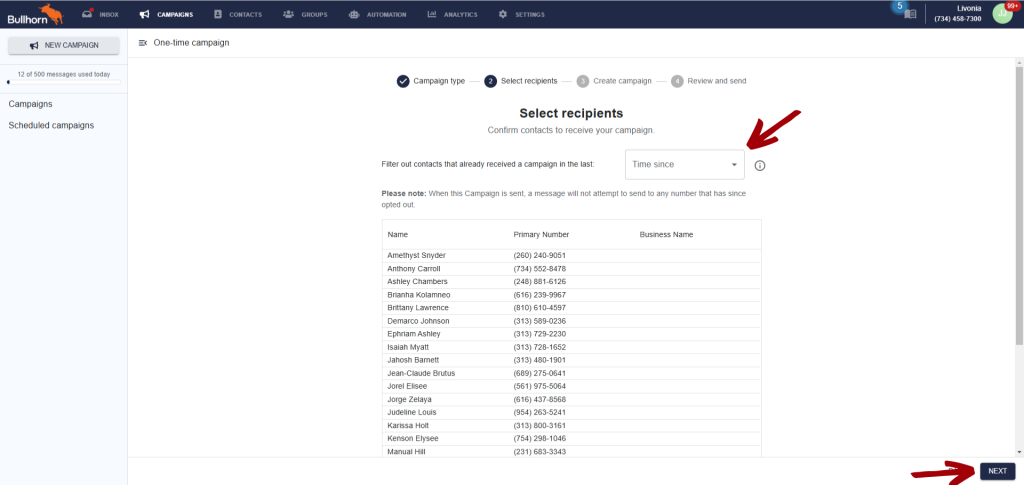
On the next page, you’re able to ensure that your data is correct and also exclude anyone that has been sent a text campaign within a set amount of time. You can also leave this blank. Then select “Next.”
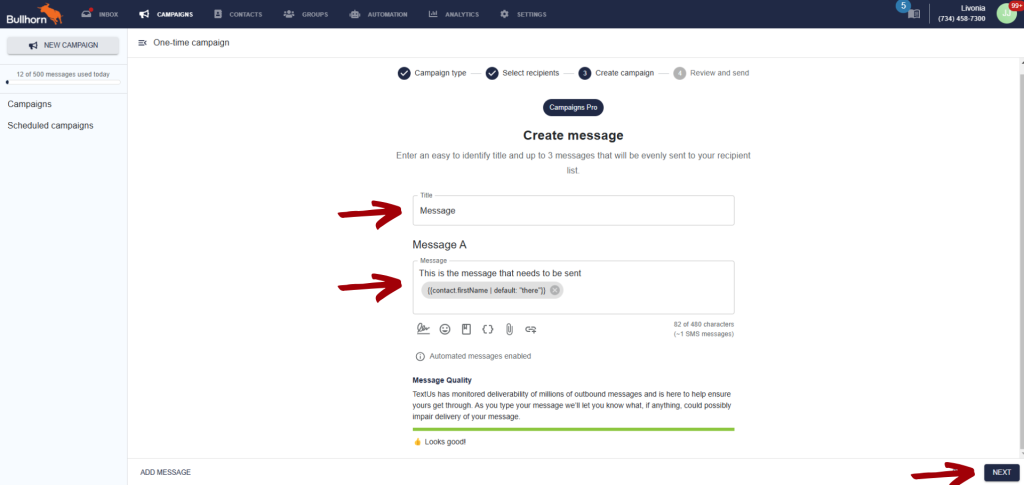
On the next screen, you’re able to create your message. Select a title and then craft your message. You’re able to personalize the message using the candidates name if you’d like by selecting the { } icon. Once you’re done crafting your message, then select “Next.”
Lastly, you just need to select whether or not you’d like to send the message now or if you’d like to schedule it to go out later. Once you’ve made your decision, select “Send Campaign.”
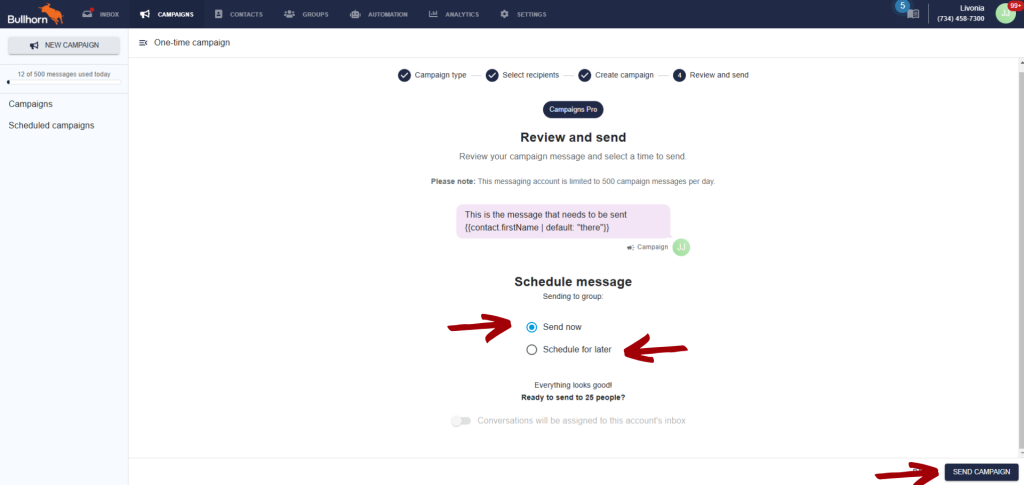
That’s it! You’ve successfully sent a mass text campaign!

